

Converting your traditional garden into an eco-friendly xeriscape can save water, but the upfront costs may seem daunting. With careful budgeting, material selection and phasing, you can create a sustainable landscape without breaking the bank. This guide explores practical ways to reduce expenses for xeriscaping, from smart design to financing. Gain insider tips on planting drought-resistant species affordably, and whether DIY or professional installation makes better financial sense.
Initial Costs of Xeriscaping Your Garden
Converting your existing garden into a water-wise Xeriscape can seem daunting when you start crunching the numbers on the initial costs involved. However, breaking down the expenses into more manageable chunks can provide a clearer picture of what you can expect to pay as an upfront investment for your eco-conscious garden makeover. The costs can vary substantially depending on factors like garden size, design complexity and plant selection, but having a rough estimate will help you budget appropriately.
Average Cost Range
If you’re wondering “how much will it cost me to Xeriscape my garden?”, a useful guideline is that you can expect to pay somewhere between $100 to $300 per square metre for a complete Xeriscape installation. This includes everything from design fees, materials and labour for preparation and construction.
On a typical quarter-acre block of around 1000 square metres, a full Xeriscape conversion would cost in the range of $100,000 to $300,000. Of course, that’s on the higher end of the spectrum. Bringing the size down to a more modest 150 square metre garden reduces the overall cost to around $15,000 to $45,000.
The exact cost per square metre depends on factors like:
- Garden size – Economies of scale mean larger gardens can be more cost effective per unit area. Fixed costs like design fees make up a smaller proportion of the total budget in bigger spaces.
- Design complexity – A simple, minimalist Xeriscape with limited zones, materials and plants can be cheaper than a complex, lush oasis with diverse microclimates. Unique water features and structures also add costs.
- Plant selection – Exotic or rare drought-tolerant species are generally pricier than mass produced natives from wholesale nurseries. A mix of sizes, from tube stock to advanced specimens, influences costs too.
The bottom line is that for a typical residential conversion you can plan on investing $200 to $300 per square metre as a starting point for Xeriscaping costs. But there are ways to reduce the initial outlay if needed.
Design and Planning Costs
Coming up with a vision and plan suited to your site, lifestyle and plant preferences is an important part of any successful Xeriscape project. Professional landscape designers charge anywhere from $50 to $150 per hour for their services. With the typical front and backyard makeover requiring 15 to 30 hours of design time, you can expect to pay $750 to $4,500 or more just for the concept itself.
It’s especially advisable to engage a designer who specialises in water-wise principles for the most practical Xeriscape layout. This upfront investment in planning and visioning pays dividends later by maximising the garden’s functionality and plant health within water, soil and sun constraints.
Some specific design and planning costs include:
- Site analysis – An experienced designer will assess your site’s unique conditions including sunlight, wind, drainage and soil. This informs plant selection and positioning. ($250-$500)
- Concept drawings – Initial hand-drawn or digital concept plans convey the layout and help visualise the finished garden. These guide construction. ($300-$1,000)
- Consultations – Meetings to discuss goals, preferred themes, functional zones and other needs. ($250-$500)
- Plant selection – Guidance picking suitable drought-tolerant species for each zone and microclimate. (Included or $100/hr)
- Irrigation design – Planning efficient irrigation for optimal watering based on plant needs and local regulations. ($300-$800)
- Council approvals – If needed, managing council or body corporate endorsement for significant landscaping changes. ($300-$1,000)
For a cost-effective DIY route, thorough online research into Xeriscaping principles and plant species can help guide your design. But for complex sites and gardens, a professional designer can maximise function and minimise costly changes down the track.
Plant and Material Costs
Once you have a design in place, it’s time to purchase the plants and materials to bring your Xeriscape vision to life. For plant costs, be prepared to pay anywhere from $5 for tube stock of common natives to $100 or more for advanced specimens of rare succulents and exotic ornamentals.
Other plant and material expenses can include:
- Drought-tolerant plants – These specially adapted species form the backbone of any Xeriscape’s water efficiency. Prices vary widely based on size, maturity and rarity. ($5-$150 each)
- Organic mulch – Essential for retaining moisture and suppressing weeds. Pine bark and wood chip mulches cost around $35-50 per cubic metre.
- Non-organic mulches – Inorganic options like pebbles and gravel can be an attractive alternative but are pricier at $50-100 per cubic metre.
- Soil amendments – Most native plants thrive in sandy, well-draining soil. Imported soil, sand and additives improve drainage. ($50-$100 per cubic metre)
- Hardscaping materials – Paths, walls, edging, decorative rocks and similar non-plant infrastructure. Budget $50-$300 per square metre.
- Watering systems – Drip irrigation, moisture sensors and timers optimise water use. Allow $5-$15 per square metre for components and professional installation.
With careful plant selection and staging over several seasons, you can control these variable costs. Seek specialist guidance to pick lower-cost but hardy plants suited to your site and Xeriscaping goals.
Converting to a water-wise Xeriscape garden involves considerable upfront investment – but the long-term benefits for your hip pocket, time and the environment make it a worthwhile commitment. With some planning and research, you can keep the initial costs within reach.
Xeriscaping on a Budget
Converting your garden into a water-wise Xeriscape doesn’t have to blow out the budget. With careful planning and resourcefulness, you can keep costs down while still achieving a functional, sustainable landscape. Focusing on simple design, budget materials and DIY involvement are all great ways to Xeriscape your garden on a tight budget.
Budget-Friendly Material Selection
Choosing cost-effective materials is one of the best ways to reduce expenses when Xeriscaping on a budget. Here are some of the most budget-friendly options to consider:
- Mulch – Bulk bags of pine bark chips, pea gravel or other organic mulches provide an affordable ground cover to retain moisture and limit weeds. Aim for $30 per cubic metre or less.
- Smaller plants – Rather than large, mature specimens, opt for tubes or pots under 1 gallon in size. Local natives bought in bulk from wholesale nurseries offer the best value.
- Drought-tolerant annuals – Short-lived sunflowers, zinnias and flowering tobacco are water-wise choices that provide colour at a low cost.
- Pea gravel – This smooth gravel mulch has a clean, modern look. Buy in bulk bags or loose bulk loads for just $30-50 per cubic metre.
- Recycled materials – Repurposed bricks, pavers, timber sleepers and similar products often cost a fraction of new materials.
- Salvaged items – Check salvage yards, online listing and council cleanup piles for cheap or free paths, edging and decorative elements.
- Water-wise plants – Divide and propagate from neighbours and friends to get free or cheap drought-tolerant plants.
With resourcefulness and research, you can find quality Xeriscaping materials at bargain prices. Develop connections with landscapers or wholesale nurseries to access savings. Every dollar saved on materials means more resources for plants and features.
Simple Design Strategies
A complex, intricate Xeriscape design with multiple levels, zones and components will naturally cost more than a simple, streamlined layout. Here are some design tips for budget-friendly Xeriscaping:
- Focus on a single attractive path to avoid the added cost of extensive paths and edging. Weave it organically through the garden.
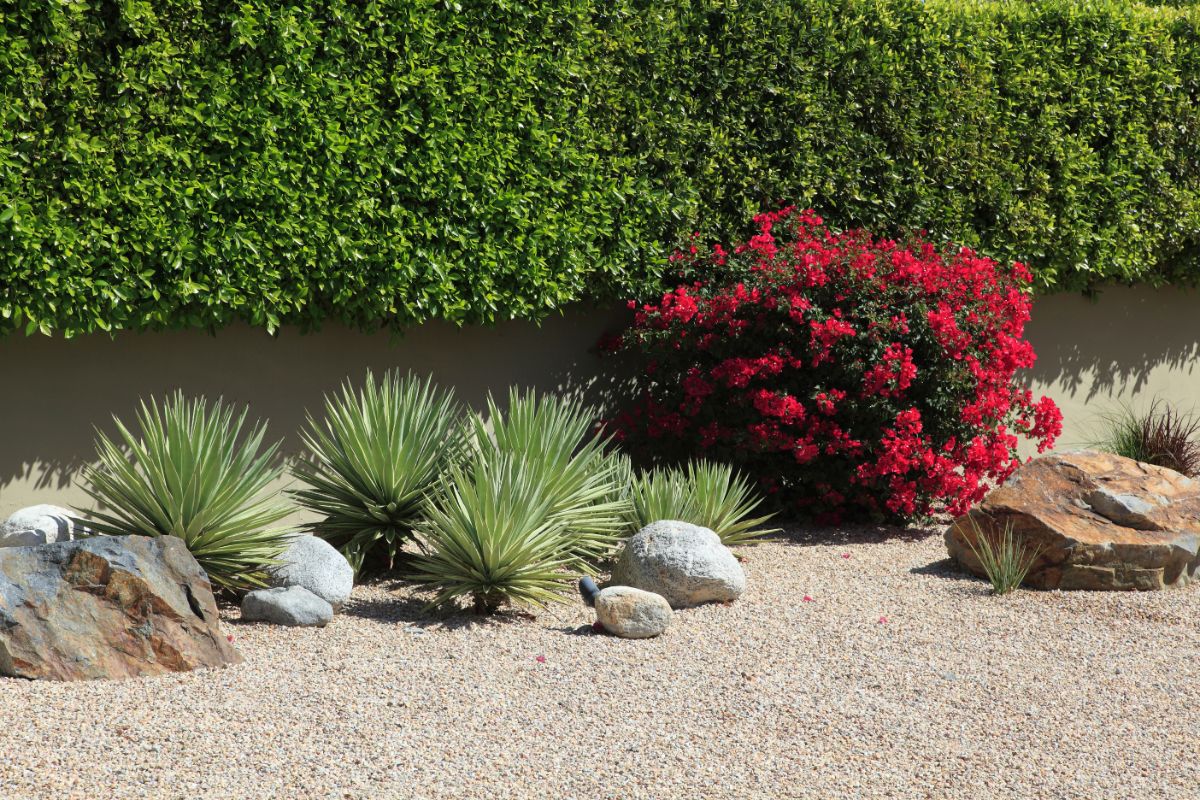
- Limit themed zones to keep plant and material needs focused. For example, create just a succulent zone and native zone.
- Use sweeping curves instead of complex geometries for a natural look without expensive hardscaping.
- Mulch over garden beds rather than using more expensive pebbles and gravels for cover.
- Group plants with similar watering needs to simplify the irrigation system design.
- Create berms and swales to passively direct water rather than using pipes and drainage.
- Use attractive drought-tolerant grasses instead of lawn for a low-maintenance, budget-friendly turfed area.
- Repurpose what you already have – upcycled elements like recycled timber retaining walls or preserved tree stumps can add character.
The beauty of Xeriscaping lies in its simple ethos of working holistically with the natural landscape. Keeping the design pared back to essentials makes budget sense without sacrificing your vision.
DIY Installation and Maintenance
One of the biggest Xeriscaping expenses comes from hiring professional landscapers for the installation and ongoing maintenance. But with some planning, hard work and learning, much of the hands-on work can be taken on yourself.
If you’re reasonably handy and willing to put in sweat equity, consider DIYing tasks like:
- Clearing and prepared garden beds – remove grass, weeds and debris yourself.
- Basic levelling, digging and shaping of mounds – use a mattock, shovel and rake for earthworks.
- Laying gravel and mulch – easily done DIY with a wheelbarrow and shovel.
- Installing pre-made pavers – lay recycled pavers on a gravel or compacted dirt base.
- Building simple paths and retaining walls – use DIY-friendly natural timber or sleepers.
- Planning and installing drip irrigation – flexible and modular systems are ideal for self-installation.
- Programming timers and irrigation controllers – easily done with manual reading and YouTube.
- Ongoing weeding, pruning and maintenance – learn skills from books, videos and local workshops.
Be sure to follow all relevant safety practices and get expert input if attempting complex structural work like electrical, plumbing or concreting. But with time and dedication, you can complete much of the installation yourself and save thousands. Ongoing maintenance like watering, weeding and mulching also lend themselves well to a DIY approach.
With the right mix of practical cost-saving strategies, you can achieve a thriving Xeriscape garden without blowing the budget. The investment will pay back over time through lush beauty, lowered water bills and improved eco-sustainability.
Regional Cost Differences
While the core principles of Xeriscaping remain the same across Australia, the specific costs involved can vary significantly between different regions and climates. Key factors like local plant availability, climate-appropriate species, soil conditions and access to professional Xeriscaping services all influence the budget you may need. Understanding these regional variables can help you estimate costs more accurately.
Climate and Soil Quality
Australia spans tropical, subtropical, temperate, arid and semi-arid regions – each with distinct climates that shape Xeriscaping costs. Hot, dry areas like central Australia and the Pilbara region of Western Australia require extremely drought-hardy plants suited to the harsh conditions. These specialty species can be more expensive than plants from milder regions.
Additionally, very hot climates may require more imported topsoil, specialty soil amendments and ongoing soil conditioning to help plants thrive – adding to costs.
Cooler mountainous climates offer natural rainfall but frost can limit plant choices and require protective mulching. Coastal gardens must tolerate salt spray and drain well to avoid problems like root rot. Each climate presents pros and cons that steer optimal plant selections and soil remediation needs.
Other factors like annual rainfall, humidity and wind levels also guide necessary irrigation expenses, which can be minimised in higher rainfall areas.
Overall, unique regional and microclimates mean location-specific plant choices and soil preparation for cost-effective Xeriscaping.
Plant Availability and Prices
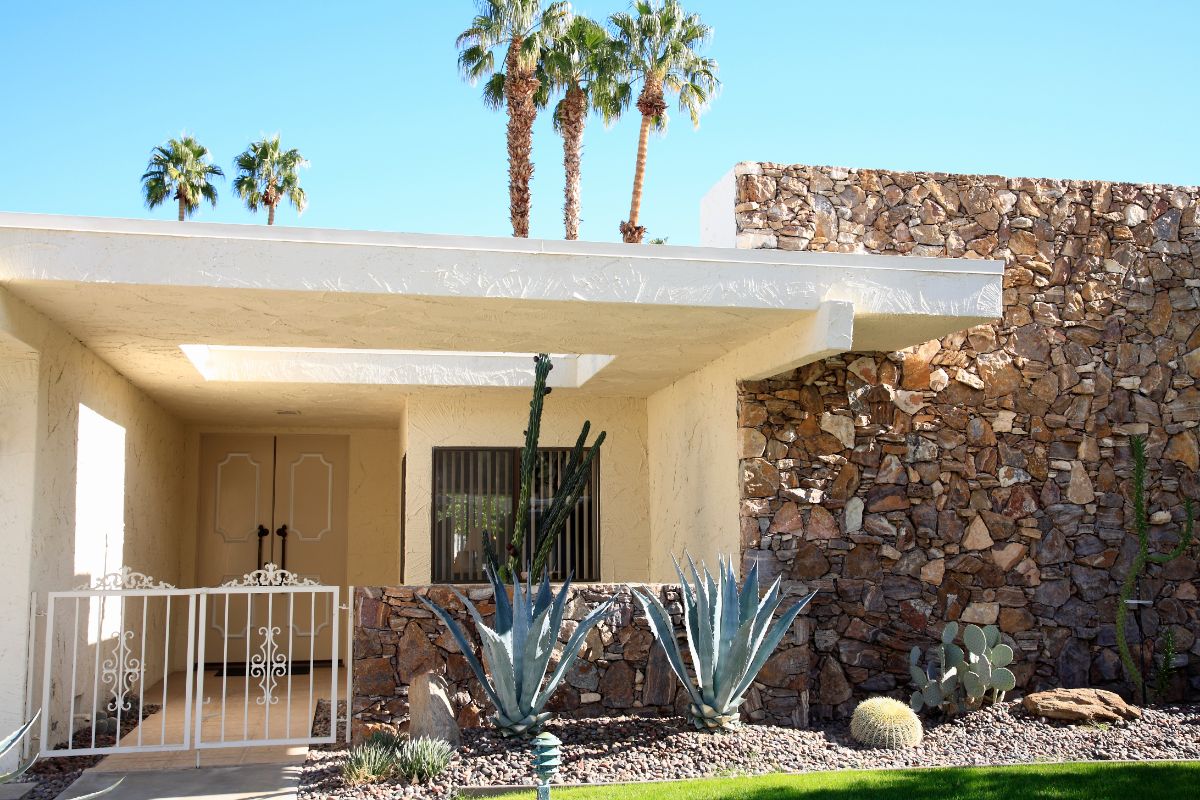
The availability and price of drought-tolerant plants depends heavily on your local climate. Arid regions with low rainfall rely on extremely hardy succulents and shrubs like agave, aloe and eremophila that tolerate heat and drought. These specialty species can be expensive and hard to source compared to more freely available Australian natives from coastal or mountain regions.
Cool, temperate regions have their own endemic natives well-adapted to local conditions. For example, Victorian natives like dianella tasmanica flourish but aren’t readily available in the Northern Territory. This can inflate plant costs due to transportation expenses.
Therefore it’s ideal to choose as many site-appropriate local plants as possible. Check council nurseries, botanical gardens and specialty growers to access plants naturally suited to your area’s unique conditions. This avoids the higher costs of importing exotic, non-local plants.
Local Xeriscaping Expertise
Hiring professional Xeriscaping services like qualified landscape designers and certified irrigation installers is advisable for optimal outcomes – but costs vary across Australia.
In major cities, you’ll have ample choice of experts familiar with sustainable landscaping and water-wise principles. But be prepared to pay premium rates of $100 per hour or more for their specialised skills and experience.
In regional areas and rural locations, access to qualified Xeriscaping professionals may be more limited. However, local landscapers familiar with local plants, soils and climates often provide greater affordability. Their established connections with plant suppliers can also help control material costs.
If your location lacks qualified Xeriscaping experts, online research and self-education will be crucial before tackling a DIY installation. Travel fees can apply if you need to bring in external specialists from major cities or interstate.
The bottom line is that if you live rurally, factor in potential added travel costs for professional services. But always utilise local knowledge and resources first for the most affordable outcome.
Financing Xeriscaping Projects
Transforming your garden into a thriving Xeriscape oasis requires a significant upfront investment, but smart financing can help fund your sustainable landscaping goals. From government grants and loans to budget planning tools, here are some options for securing financial resources for your project.
Grants and Subsidies
One of the most affordable ways to fund a Xeriscape makeover is through grants, rebates and other financial incentives aimed at promoting water-wise gardening and environmental sustainability.
Many city councils and local government authorities offer these programs, which can subsidise a portion of your costs. For example, the City of Sydney offers a Native Plant Rebate covering 50% of purchases from approved nurseries, up to $500. This helps residents afford suitable drought-tolerant natives.
State governments also provide assistance. The NSW Government’s Living Greener grant scheme has previously funded council projects like Xeriscape garden makeovers, green walls and stormwater harvesting.
And national programs like the Smart Approved WaterMark certification provide rebates for soil moisture sensors, weather-based controllers and other water-saving irrigation products.
So be sure to thoroughly research all available subsidies, vouchers and rebates in your local area and state. Even recovering a few hundred dollars helps offset the initial investment in sustainable Xeriscaping features.
Loans and Financing Options
If upfront grants don’t cover the full costs, home improvement loans and financing can fill the gap. Products like a secured garden loan or line of credit allow you to progress your project and repay the balance over time.
Banks and credit unions offer competitive interest rates from around 5% on secured loans using your property as collateral. Make sure to only borrow what you can comfortably repay.
Other options include:
- Personal loans if you have sufficient income and credit.
- Balance transfer credit cards with introductory 0% interest periods.
- Eco-friendly green loans designed for environmental projects.
- Finance through nurseries and landscapers, repaying in instalments.
- Accessing your home equity through mortgage restructuring.
Seeking professional financial guidance can help identify the most suitable approach based on your personal situation. But with the right financing strategy, you don’t need to fund your Xeriscape garden entirely upfront.
Budget Planning and Management
Managing costs doesn’t end once you’ve secured financing – diligent budgeting and monitoring is key to completing your project on budget.
- Set a detailed budget including design, materials, labour and maintenance costs. Buffer at least 10% for contingencies.
- Get quotes from several suppliers and contractors before committing – don’t just take the first price.
- Phase your project over time to spread costs out. Establish the garden shape and irrigation first, then add plants gradually.
- Track all expenses in a spreadsheet and review regularly. Identify potential overruns immediately.
- Avoid impulsive purchases and last-minute additions – stick closely to your planned allocations.
- Consider handling aspects like earthworks yourself to save on labour. But don’t compromise on safety or essential expertise.
DIY Xeriscaping vs. Professional Xeriscaping
When planning your drought-resistant garden transformation, a key decision is whether to tackle it as a DIY project or hire professional landscaping services. Both routes have their own costs, benefits and limitations to weigh up. With careful planning and realistic expectations, a DIY makeover can achieve beautiful results and savings – but involves greater time and effort. Professionals take the hard work off your hands but come at a higher price.
Cost Differences
The most obvious distinction lies in the cost comparison between DIY and professional Xeriscaping. Hiring a professional landscape designer can cost $100 per hour or more. Typical concept designs require 15-30 hours of work, so you’re looking at $1,500-$3,000 just for plans. Then add market rates for certified irrigation installers, experienced landscapers and tradies to handle earthworks, plumbing and concreting. A full-service Xeriscape makeover often exceeds $15,000-$20,000.
In contrast, a DIY project incurs mainly material expenses rather than labour. With strategic sourcing of bulk mulch, gravel and small starter plants from low-cost suppliers, you may spend $5,000-$10,000 on materials to self-install your design. But this requires extensive manual work and learning new skills. Value your time appropriately based on your capability and availability.
DIY provides massive cost savings but demands time in return. Weigh up where your budget constraints lie before deciding. Bring in targeted professional help where needed – like complex irrigation wiring – but handle the rest yourself.
Advantages and Limitations
Both DIY and professional Xeriscaping carry distinct advantages and limitations to factor in.
Hiring experts allows you to tap into years of experience and technical skills well beyond an amateur. Professionals ensure:
- Exceptional design suited to your site’s unique conditions and challenges.
- Correct plant choices that suit your climate and xeriscaping goals.
- Efficient irrigation plan and installation optimised for water conservation.
- Compliance with regulations and best practices for sustainability. -Greater likelihood of long-term success and reduced future issues.
But this expertise and quality comes at a literal cost. Professionals also limit your control and creative input compared to DIYing aspects yourself.
Doing it yourself provides immense satisfaction and creative freedom. But be realistic about your existing skills and time availability. Consider:
- Design requires knowledge of xeriscaping principles and plant species.
- Installation demands physical labor and safe handling of tools/machinery.
- Maintenance involves developing long-term gardening expertise.
Without experience, a DIY project risks expensive failures, plant deaths and substandard irrigation. Seek guidance from books, courses and xeriscaping professionals to self-educate before attempting extensive work solo.
Considerations for Decision Making
Weigh up the following factors when deciding between DIY and professional routes:
- Budget – If money is tight, DIY provides big savings but demands time instead. Allocate funds for critical professional guidance.
- Skills – Assess your existing gardening, landscaping and DIY abilities to determine what you can realistically handle alone.
- Time availability – Consider your schedule and willingness to dedicate hours to planning, hard labour and learning new skills.
- Garden priorities – DIY suits creative freedom and personal touches. Professional installation guarantees expert-level quality and performance.
- Long-term plans – Professionals often provide better foundations for a lasting, low-maintenance xeriscape suited to your lifestyle.
- Site complexity – Difficult terrain or elaborate designs warrant professional expertise to handle the challenges.
With the right balance of DIY effort and targeted professional guidance, you can create a cost-effective xeriscape garden customised to your needs, budget and capabilities.
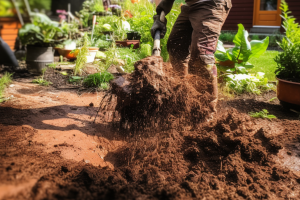
Soil Removal Cost Per M3
Table of Contents How Much Does Soil Removal Cost Per M3? The average cost for basic fill dirt removal is $28-$45 per cubic meter. General soil removal ranges from $35-$55
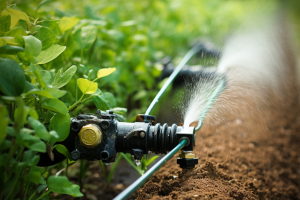
Irrigation System Cost
The total cost to install an irrigation system ranges from $1500 to over $10,000 depending on size and complexity, with professional installation averaging $5000. Ongoing maintenance runs $200 to $500 yearly.
How Much Does it Cost to Hire a Gardener
Table of Contents How Much Does it Cost to Hire a Gardener? Gardener rates range from $40 to $60 per hour, potentially increasing with task complexity. Garden clean-up costs range